How to integrate a 3rd party component
A guide on how to add 3rd-party components to a project.
The Allcancode platform focuses on custom web and mobile applications. By custom, we mean that we do not impose any limitations on what you can build, and on the contrary, we encourage you to create unique user experiences instead of look-alikes based on templates. It is a matter of building a competitive advantage, so it does not make any sense to have the same applications as your competitors.
Additionally, we strongly support the hybrid model where no-code/low-code is mixed with full code by hybrid teams with:
- Platform developers. They focus on using our platform to create UI layouts and write UI logic.
- Framework developers. They understand the target framework and focus on choosing any necessary 3rd party components or building new ones.
In that direction, we enable users to bring in components built outside the platform, whether they come from the open-source community or are licensed or have made them in-house. In this post, we will explain how that is possible for two types of components:
- User interface components
- Logic components that do not have a UI but deal with data processing or communication with the backend.
For the sake of simplicity, let's assume that you are building a web application and you have chosen React as the framework for which the platform will generate code. I will present examples for mobile applications in separate posts as in that we need also to take care of Android and iOS configuration settings.
User interface components
As an example, the component that you need to integrated is the Material TextField from the MUI library. The related documentation is available here.
You need to create a new component in your project and open its properties by right clicking on it. The next steps are the following:
1. Define the interface to the platform
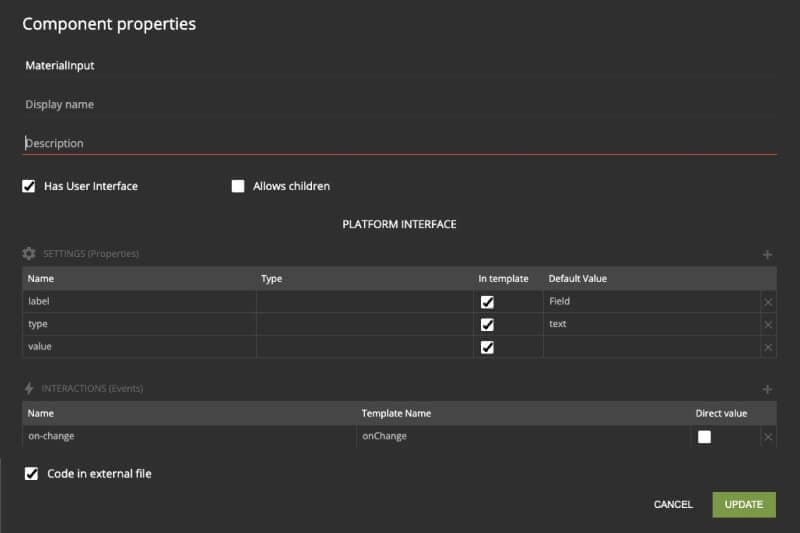
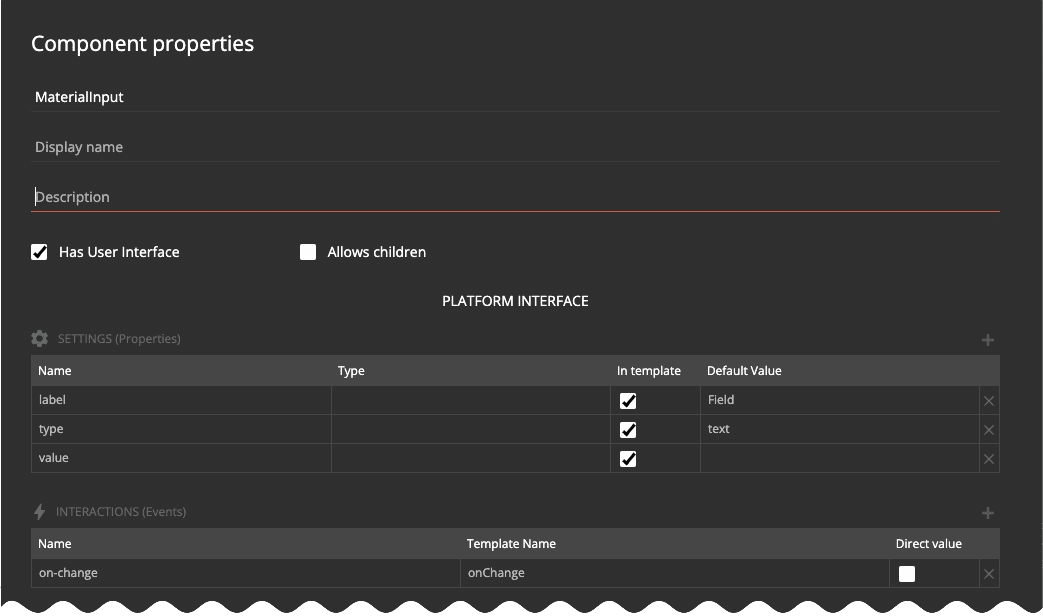
In the following screenshot, I have defined the settings (properties) and interactions (events) that I want to be available to platform developers. The "In template" checkbox specifies that the property will appear in the template. The "Template Name" in the interactions table refers to the name of the event provided by the component's documentation. It will be added to the template automatically. The "Direct value" refers to whether the component will send the new value directly to the event handling function or through an event object.
2. Define the component template
In the following screenshot, I have defined the required packages and import along with the React template code for the component that the platform will include during the code generation phase. I am referring to the settings using their name among double underscores. The code generator will replace the special symbol __common__ with any attributes provided in the Attributes Panel of the platform.
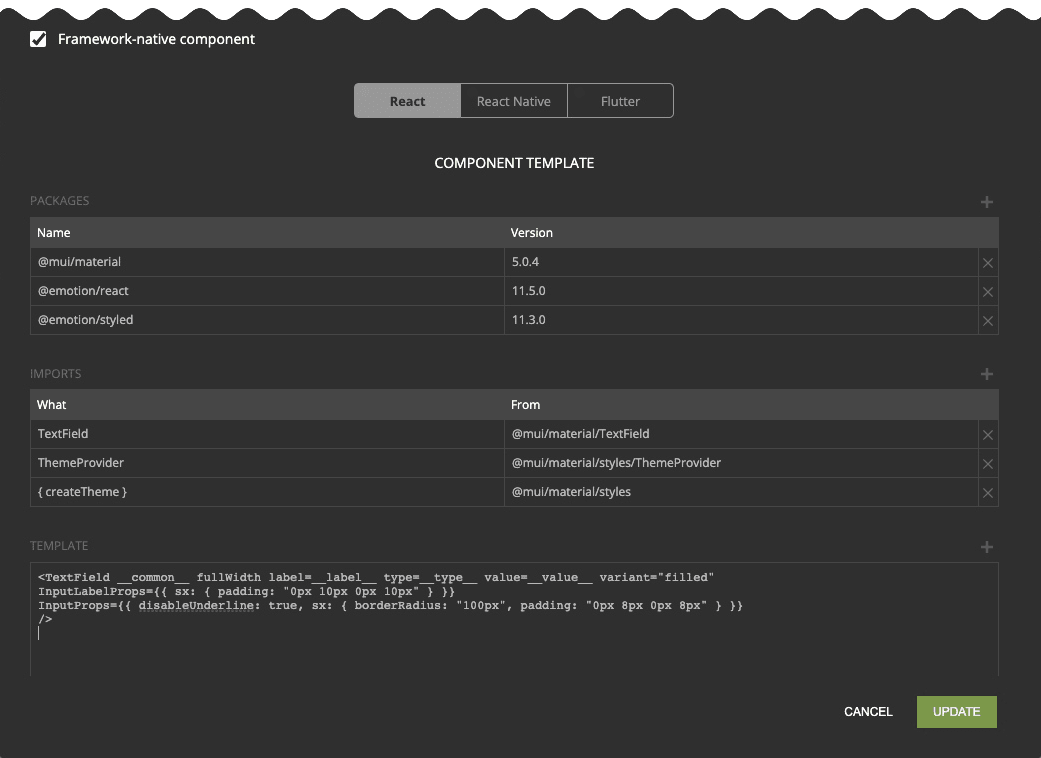
After clicking on the "UPDATE" button, you can use the component as any other component created by you or provided natively by the platform by adding it at any place in the layout tree of your page.
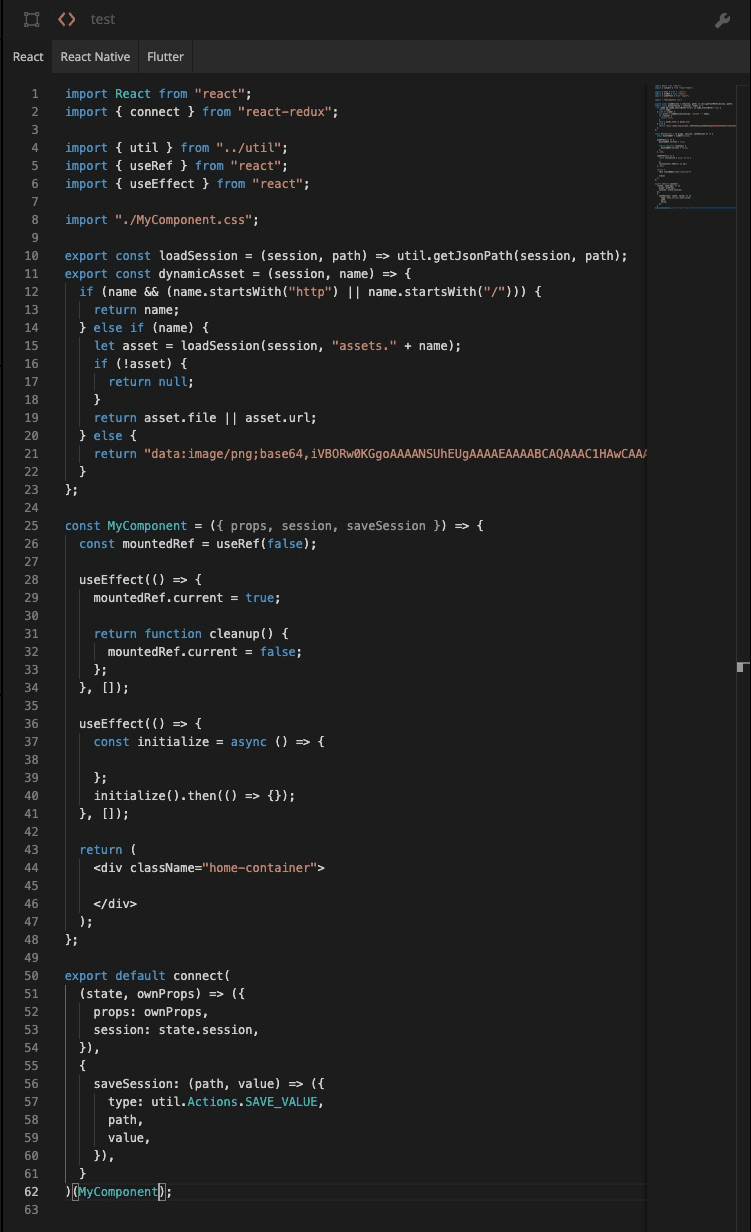
In the case that you want to integrate your own component, then you follow the same steps but you leave the "Imports" and "Template" sections empty and instead you provide the full code of the component in the coding editor as shown in the following screenshot:
Logic components
The same steps apply to logic components that do not have a user interface. The difference is that you need to uncheck the "Has User Interface" checkbox and define the functions exposed to platform developers instead of the settings and the interactions as shown in the following screenshot for the Microsoft Authentication Library.
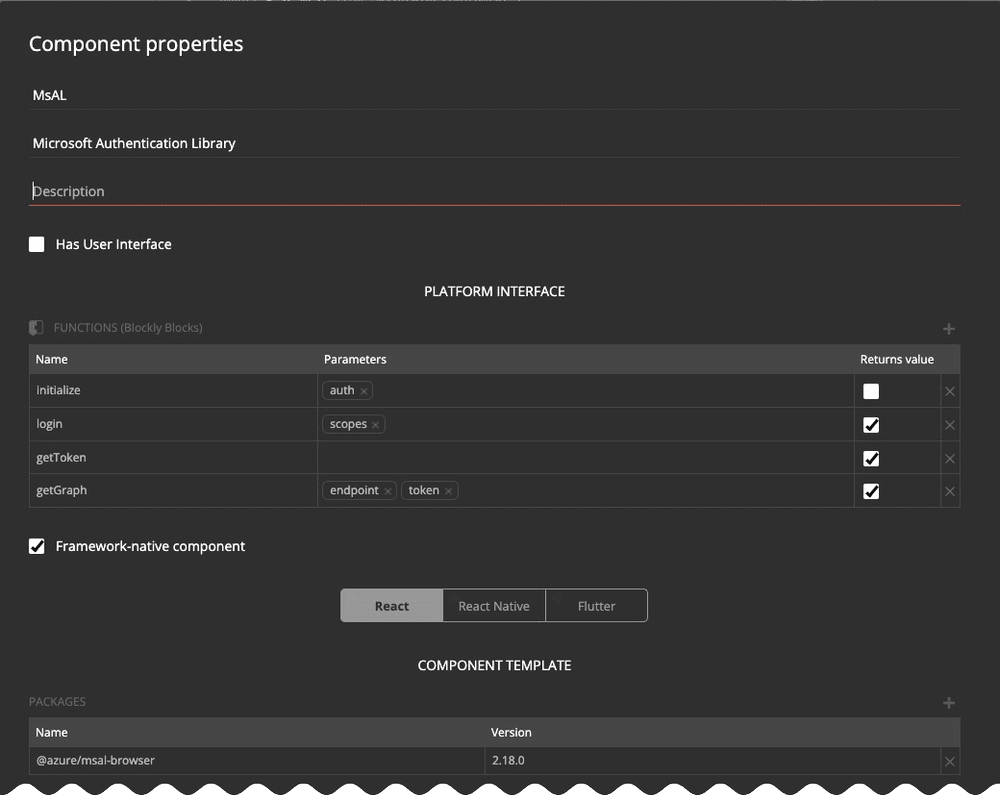
Finally, you need to provide the React code for the components as shown in the following screenshot:
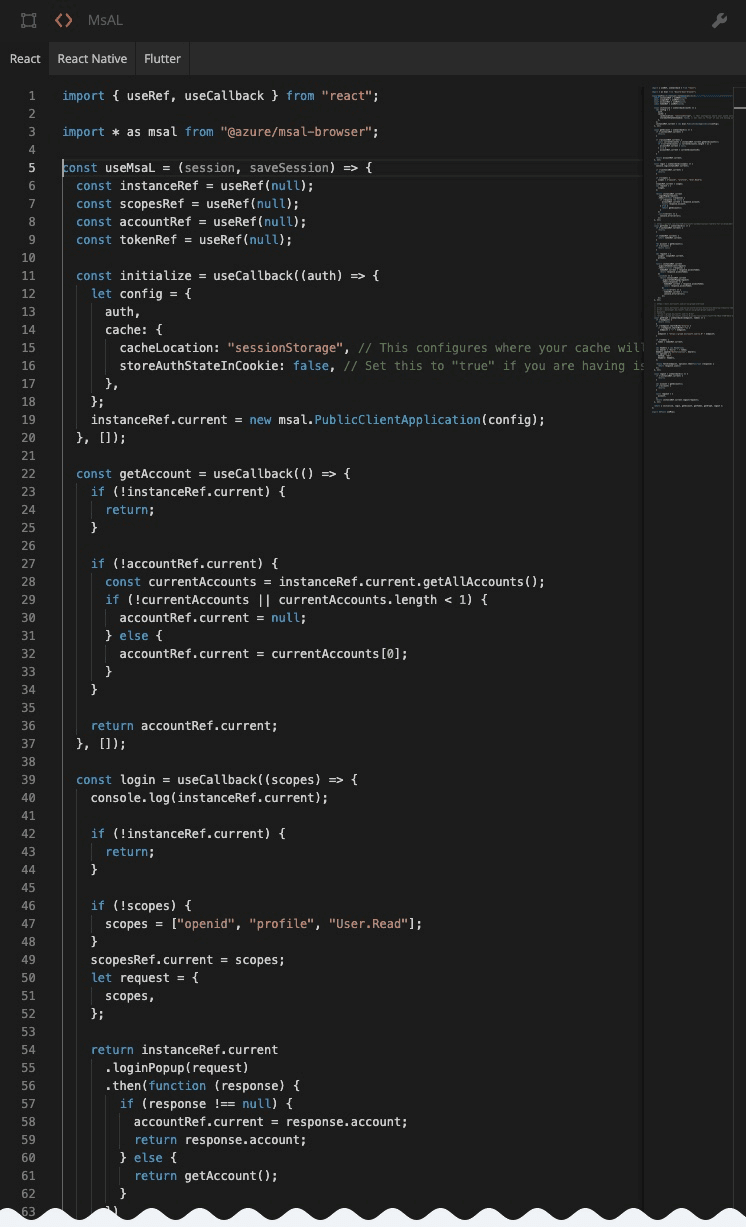
We will keep adding popular components to our libraries so that you can just use them in your projects. In any case, the Allcancode team is always available to help you integrate your components and it is very easy to reach out to us through our online community or by posting a support ticket from within the platform based on the support services level that you are in.